Thankfully, this isn’t a serious problem, but rather a little inconvenience due to glitches. So, let’s look into more causes and solutions to fix the VGA lights on your motherboard.
Why is the VGA Light on the Motherboard On?
Fixes for VGA Lights on Motherboard
Before we get to the fixes, we should make sure that the motherboard and the graphics card are compatible. If the motherboard is outdated and the graphic card is a newer model, they might not be compatible. Now that we know what the VGA light means, here are few possible causes why they lit in the first place:
Motherboard is not compatible with the graphic card. Not enough power to the GPU Damaged GPU pins/slot Monitor is turned off
However, sites like buildmypc and pcpartpicker are a good way to check if the parts you have are compatible with each other. So, Let’s try a few solutions to fix the VGA lights issue.
Check Your Power Supply
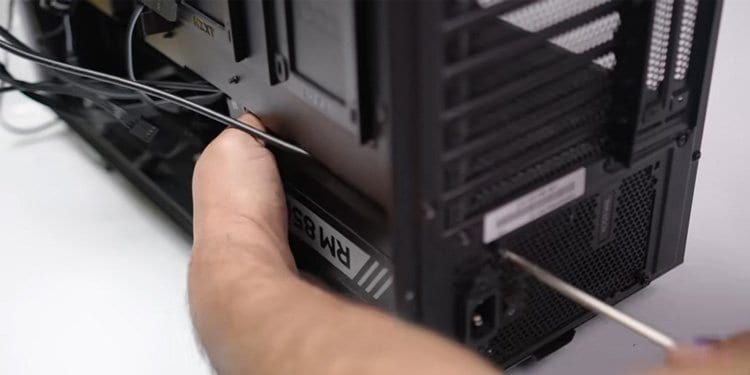
Low wattage PSU (Power Supply Unit) for your system can stop some parts from functioning, in this case, the graphics card. Sites like Newegg and Coolermaster have a Power Supply Calculator section to help you calculate the power your system requires. Once you enter all your parts, the site will recommend the PSU wattage for your computer. If the watt number on your PSU is lower than the website’s number, you might need to get a new PSU.
Remove all Hardware
Removing all unnecessary hardware to boot up your computer will help you narrow down where the problem arises. Remove all external peripherals like USB devices, Hard drives, PCIe cards. Boot up your computer only using the CPU, CPU fan, RAM (only one stick). Now, if the computer turns on normally, reconnect the devices one at a time to determine which parts are causing the issue.
Reseat the Graphics Card
The motherboard will turn the VGA lights on if the graphic card is not seated properly on the PCIe slot. Please follow these steps to remove the graphic card from the motherboard and reinsert it properly.
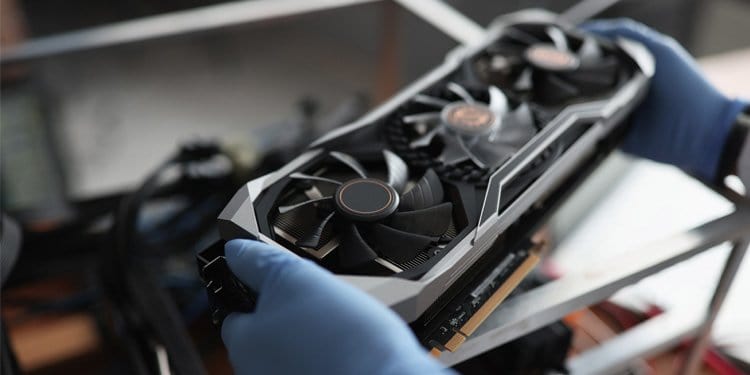
Removing the Graphics Card
To remove the graphics card, open the PC case and disconnect all the cables that are connected to the graphics card. Then, unscrew the graphic card from the case’s mounting bracket located on the backside of the CPU case. Unlock the card from the slot by gently pulling the small lever on the PCIe slot. Now, gently remove the graphics card.
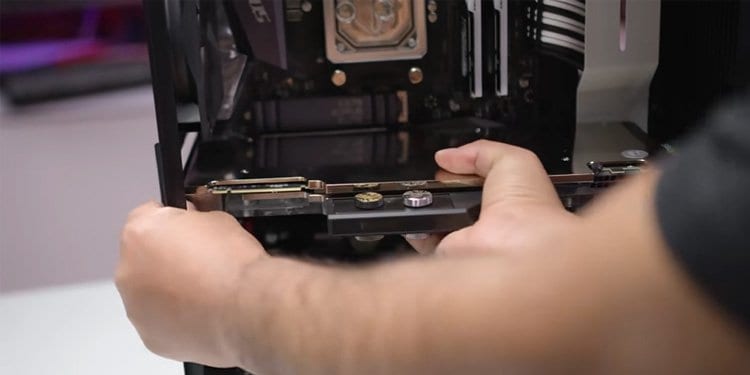
Reinserting the Graphics Card
First make sure the PCIe slot clip is unlocked, then press the card gently on the slot until you hear a click. Now, screw the rare bracket to secure the card onto the PC case and connect the required PSU cables.
Boot Without Graphics Card
If the motherboard uses an Intel processor, you can boot your computer without a graphic card. The Intel processor has an integrated GPU that you can use instead of a dedicated graphics card. However, you cannot run graphic-intensive tasks using an integrated GPU. Follow the steps mentioned above in Reset the Graphics Card to remove the graphics card.
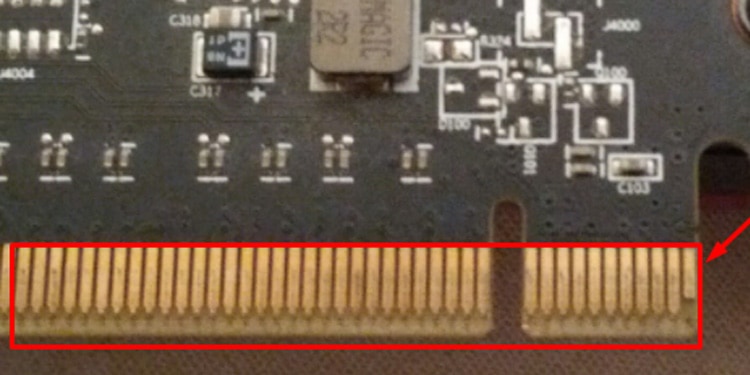
Check for Any Damages/Stains in GPU or PCIe Slots
Damages on either the PCIe slots or the GPU can stop the motherboard from detecting the graphics card. The graphic card has a PCIe Express x16 Connector that might get damaged. They are small gold-plated lines that communicate data between the motherboard and graphic card. If these lines are damaged or stained, the motherboard may not detect the graphics card. If the gold-plated lines are stained, you can clean them using rubbing alcohol and cotton swabs. But, if these lines are damaged, you may have to replace the card itself. As for PCIe slots, these slots are attached to the motherboard, so the chance of damaged PCIe is low. However, dust may settle on the slot and can obstruct data flow between GPU and motherboard. To clean the PCIe slots, you can simply use a can of compressed air to blow all the dust out of them.
Reset and Update BIOS
The BIOS (basic input/output system) is a critical program responsible for booting up your system. The BIOS can enable or disable all the connected devices to the motherboard. If some specific setting on the BIOS is altered, this may cause some parts to malfunction. However, you can easily fix this by resetting the BIOS to factory default settings.
Reset BIOS
Depending on the motherboard manufacturers, follow any of these steps to reset your BIOS. Note: Resetting the BIOS will not reset the OS Reset from BIOS Itself To reset your BIOS settings, first, you will need to access the BIOS. To access the BIOS, restart your computer and press the Del key (this may vary according to the motherboard’s manufacturer) rapidly. you will find an option called Load Setup Defaults (also depends on the motherboard manufacturing company). Press Enter and Save Changes. Reset Using the CMOS The CMOS (Complementary metal-oxide-semiconductor) is a battery-like device that stores the BIOS setting. To reset the BIOS, you will need to remove the CMOS from the motherboard. Reset the Jumper You can also reset the CMOS jumper. This will reset your CMOS which in turn will reset the BIOS settings.
Replace CMOS
If resetting the BIOS does not fix the issue, you can also replace the motherboard CMOS itself. Remove the CMOS replace it with another one.
Update BIOS
An outdated BIOS version may also cause the VGA lights on the motherboard to flash. However, you can easily update your BIOS to fix the VGA light flashing issue if you are using the latest motherboard. Newer models of motherboards will have an option to update the BIOS with the flash BIOS button on the I/O panel. Once you have updated the BIOS, start the computer to see if the VGA light still turns on. If it does then there is surely some issues with your hardware and it needs replacement.
Related Questions
What Does Red/Orange LED Light on Motherboard Mean?
The motherboard provides you with enough information to figure out which parts are causing the LED light to turn on. Some writings like BOOT, VGA, DRAM, CPU near the LED lights show the parts that are not detected.
What Does a Yellow DRAM Light Mean?
The Yellow DRAM light means that the motherboard is not detecting any RAM in the memory slots. You can solve this issue by reseating the RAM sticks or cleaning the dust settled on the memory slots using a can of compressed air.
Why Is My Monitor Not Turning On?
There may be a lot of reasons your monitor is not turning on. To figure out where the problem starts, first check the motherboard. If any red or orange LED lights are blinking, the LED might indicate where the trouble begins. Check all the connections with internal and external hardware, re-seat your RAM sticks, and make sure that the monitor is connected to a power source. Now, try booting the computer; if the computer boots normally, the issue lies within disconnected hardware. Then, add one hardware at a time to determine which device is causing the problem.