If a motherboard fails, you could have blue screens, freezing, beeps, inability to detect USB drives and other hardware, and more. This guide will teach you how to test a motherboard with a multi-meter before installing other PC parts.
Necessary Tools
You will need the following tools to complete your motherboard diagnostics testing.
A Phillips screwdriver or power switch jumperA multimeter to check voltagesA working PSU (Power Supply Unit)A new CMOS battery if necessaryCPU thermal paste
How To Test A Motherboard
Before you place your brand new motherboard into the case, you need to POST (Power-On-Self-Test) the motherboard to verify that it works and that you didn’t receive a motherboard that is DOA (Dead On Arrival). Here is how you can test the motherboard is working or not.
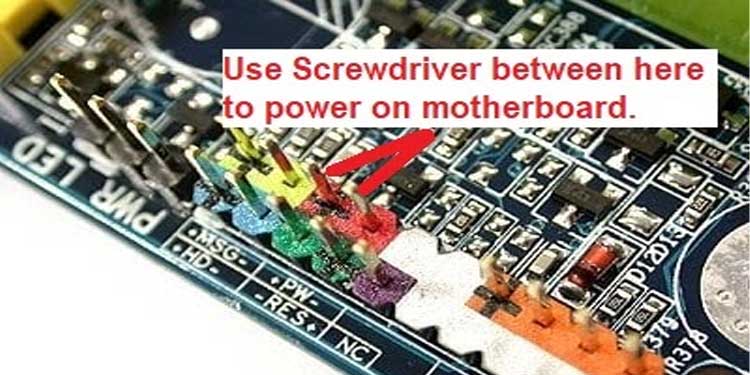
Set the motherboard on a flat, non-conductive surface such as a wooden table.Install the processor and apply thermal paste.Attach the CPU cooler and connect it to the motherboard.Place at least one RAM module into the slot labeled (DIMM 1). Attach the GPU to the motherboard and connect the necessary power connector if necessary. Read your GPU manual to verify.Plug the ATX 24-pin connector from the PSU (Power Supply) into the motherboard.Connect the monitor to the HDMI connection on the side of the board for onboard graphics or into the GPU if it’s your primary display.Plug the PSU power cable into a surge protector or wall outlet.To turn on the computer, use a power switch jumper, or if you do not have one available, you can even use a screwdriver to complete the power circuit shown above.
After verifying a successful POST, turn the PC off by flipping the switch located on the power supply back to the off position.
If the computer boots to the BIOS, you are good to go. Unplug everything, and install the motherboard into your case and install everything as usual. If your motherboard did not POST, retry the steps again, and if it still fails, contact the motherboard manufacturer and request an RMA to get a new motherboard.
How To Diagnose Motherboard Failures
Motherboards can be one of the most stubborn components to diagnose due to the sheer number of tiny parts embedded in them. In my experience, when motherboards fail, they typically will not boot, power on, or anything. The following steps can help narrow down your symptoms.
The Power-On-Self-Test or (POST) happens each time you turn on your computer. If your computer is operating normally, you should continue the startup. If you are unable to complete the POST, then proceed to the next step.Verify that your motherboard is not shorting out on your case. Verify that you have correctly installed stand-off screws in all the correct screw locations inside the case.Check your system for possible overheating. Open the case and ensure that there is not dust covering the fans, components, and motherboard. If so, use a can of compressed air found at your local hardware store to clean it.Listen for beep codes when booting your PC. These beep codes will help you identify the faulty component or issue. For a list of beep codes and what they mean, go here.Use the BIOS to check for updates, download and install them. If no updates are available, restore or reset your BIOS to reverse all settings to default and restart the computer.If you still cannot access the BIOS because your computer keeps restarting, Replace the CMOS Battery. If your PC continues into BIOS after battery replacement, your motherboard issues should end. But if they do not, continue diagnosis.Finally, remove all components other than the CPU, the CPU Cooling Fan, and the RAM. If your motherboard boots and POSTs, you will need to add one piece of hardware at a time until you find the faulty component.
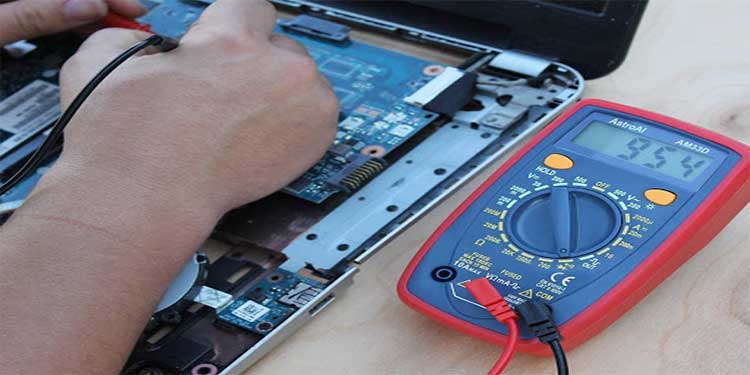
How To Test A Motherboard With A Multimeter
If you have a multimeter, then you will be able to detect issues with the motherboard easily. Even if you have never used a multimeter in the past, I will walk you step-by-step on how to test your motherboard for component failure.
How To Check Ac Voltage
The first thing you want to look for with the multimeter is a short circuit. These are common issues and can happen when there might be a surge in electricity. Below we will be verifying the AC voltage of the motherboard.
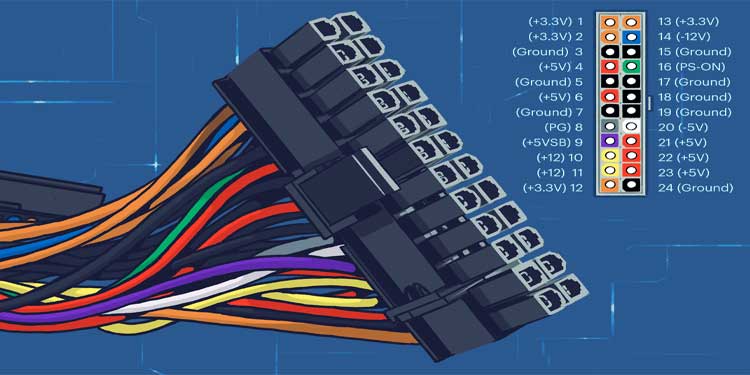
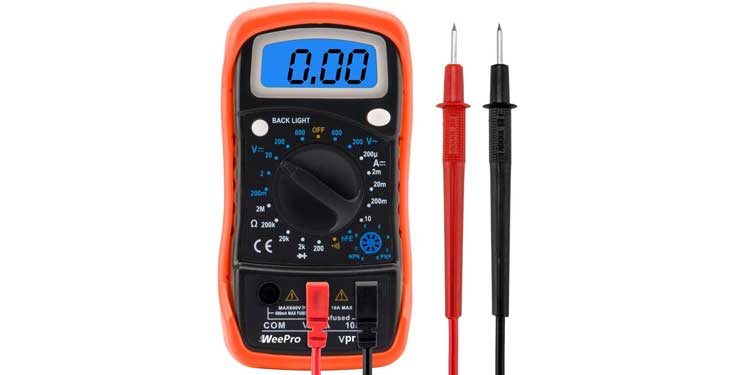
Turn off the computer and unplug all cables.Wait about 10 minutes so that everything cools off and has no charge.Set your multimeter to the lowest setting. (0.1) or 200 (OHMS) resistance.Bring the meter to 0 by touching both leads together, touch the chassis to ensure you still get a 0.Open your computer and locate the ATX power connector on your motherboard and remove it.Touch the red lead to the power connector’s ground pin (any black wires) while touching the black lead on the chassis. You should still have a 0 reading.Keep the black lead on the chassis and use the red lead to check all colored wires. Ensure that each of the voltages is correct according to the pinout below. If the voltage is slightly over, it’s okay. If it is under, there is a problem.
Next, remove the motherboard from the case and refer to the layout picture or this ATX 24-pin chart to find the PINs. Using the red lead, test each of the following: (3,5,7,15,17,18, and 19) must have a 0 reading. Anything else indicates a bad PSU connector.The last test will require you to remove the ATX power adapter and the CPU from the motherboard. Test the same ATX pins located on the motherboard. Any reading other than 0 means there is a problem with the motherboard connector.
How to check DC Voltage
To check DC voltages, follow the steps below. The steps here are slightly different than AC voltages.
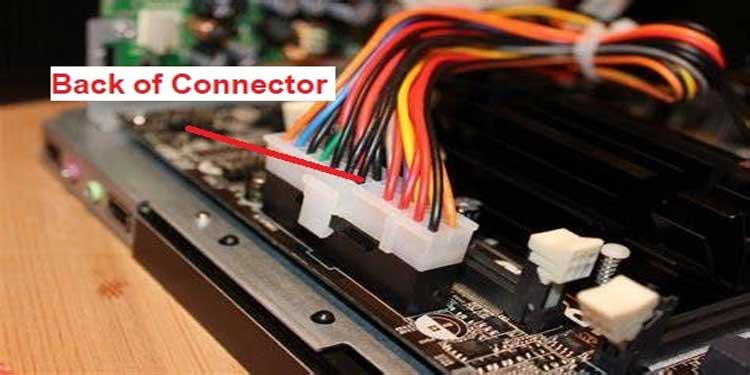
You will need to connect the 24-pin ATX cable into the motherboard and then plug the PSU into a wall outlet.Change your multimeter setting to 20V DC.Use the black leads to probe the connector on the back touching the 17, 18, and 19 pins.The red lead needs to probe pin 9 (should read 5V) and then pin 16 (should read between 3-5V).Now turn on the PC; if the readings drop to 0, that is awesome. If not, you will have to replace the motherboard.Use the red lead again and check pin 8. It should be reading a bit more than 2.5V. Press your computer’s reset button and see if the readings drop down to 0 and then back up. If not, the motherboard will need replacing.
If you have found that the motherboard has failed, don’t try repairing it on your own. Even if a repair is successful, improper voltage regulation could destroy everything in your computer. It is always better to have an experienced electronic technician repair the motherboard or replace it than venturing to fix it yourself.
How To Test RAM Slots On Motherboard
With the computer turned off, carefully probe the back of the connector using the black lead. It should be in contact with one of the negative pins 15,17,18 or 19, registering a 0 voltage.Use the red lead to probe and verify the following pins: Pin 16 (green in color) reading between 3-5 volts and Pin 9 (purple color) reading 5 volts.Now, start the PC. Pin 16 (green color) should drop down to 0 volts. If it doesn’t, this is indicative of a faulty switch. (Turn off the PC)Finally, use the red lead on Pin 8 (gray color) should read 5 volts. Start the computer and press the reset button; now, the voltage will drop down to 0 volts, then go back up to 5 volts. If not, this is a good indicator that you have a defective RAM slot, and you will need a new motherboard.
How to Test Motherboard Without CPU?
You don’t have to have a CPU to verify that the motherboard is working and powering connected components like case fans and RGB lighting. I know because I have done this on numerous occasions.
How to test a capacitor on a motherboard?
Unfortunately, there is no way to test the capacitor on a motherboard without removing the capacitor itself. However, you can visually inspect each capacitor for rust, cracks, leaks, or bulges, and this will give you a good idea that the capacitor is damaged.
Can a motherboard be repaired?
A motherboard can be repaired by an experienced electronics technician in many cases and may still be less expensive than a replacement if it is an older PC. If you have to purchase a new motherboard, you may also have to replace the CPU and RAM.
Is replacing a motherboard worth it?
The fact that the motherboard is responsible for distributing controlled amounts of current throughout the computer and its peripherals makes it very worth it. A failing motherboard could cause surges of current that could potentially destroy your RAM, GPU, CPU, etc.
What happens if my motherboard is damaged?
If you just purchased your motherboard and it was damaged when you opened it or during installation, it should be under the manufactures warranty. You will need to call the manufacture and request an RMA (Return Merchandise Authorization). If you have had the motherboard for a long time and it is out of the warranty period, you will need to purchase a new one.