The reason why this happens isn’t exactly clear, but it may be because of corrupted files. There are a few things you can try, to remove the box and, hopefully, keep the problem from popping up again. These steps mostly work the same regardless of which version of Windows you have, but they are geared towards Windows 10.
Disable Audio Switch at Startup
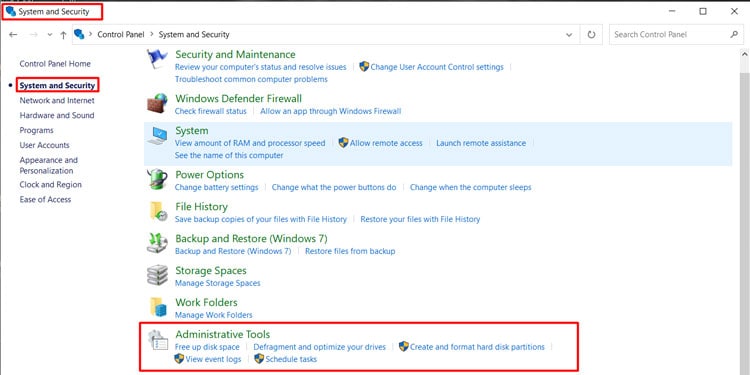
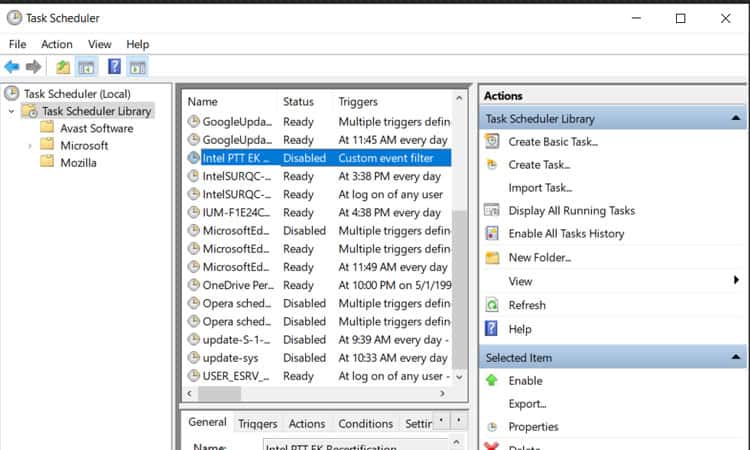
Normally you can disable startup tasks in the Task Manager, but HP created a scheduled task in the system settings for HP Audio Switch. That means you’ll have to use Task Scheduler. To find it, open your control panel and click on System and Security. Scroll to the bottom and click on Administrative Tools. A new window will open up. Look through the list and find Task Scheduler then double-click to open it. Another new window divided into three sections will open up now. In the right-hand menu, click on Task Scheduler Library. A list of the currently scheduled tasks on your computer will show up in the middle. Find HP Audio Switch in the list and click on it. Finally, look at the bottom part of the left-hand section under Selected Item. There you’ll see a Disable option. Click on it and restart your PC for it to take effect. If you ever want to re-enable HP Audio Switch again, you can just follow these steps and click on Enable instead. You can also click on Delete but that won’t give you the option to re-enable the setting at a later time.
Update Your Audio Drivers
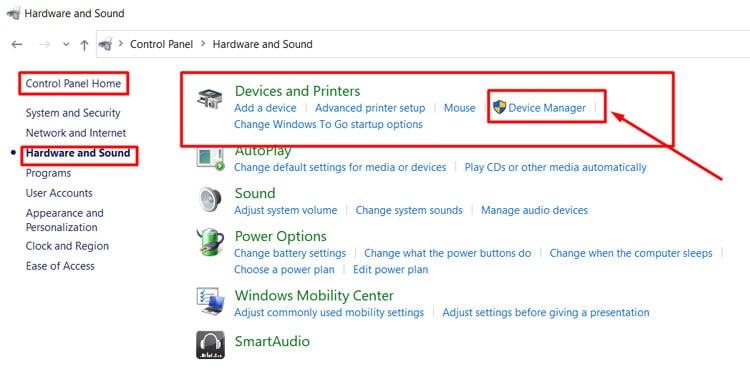
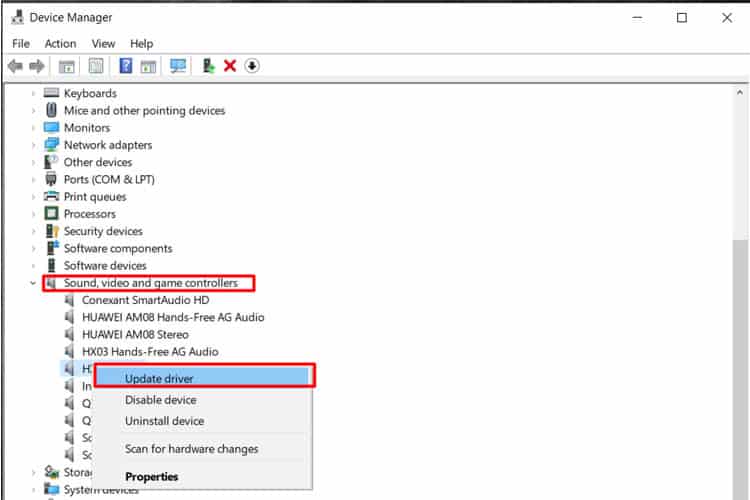
It’s possible that fixing your audio drivers will overwrite any corrupted files and make the box disappear. To do that, open up the Windows Control Panel and select Hardware and Sound. In the new menu, select Device Manager in the list under Devices and Printers. Look for “Sound, video and game controllers” in the list and find the HP Audio driver or select your computer’s main audio speaker/device. Right-click on it and select “Update driver”. In the new window, click on “Browse my computer for drivers” and then on “Let me pick from a list of available drivers on my computer”. Select the HP Audio drivers.You can also choose to uninstall the drivers, but then you’ll have to reinstall them again or your sound won’t work at all. Find the correct drivers for your computer on HP’s website.
Repair Corrupted Files With Windows System File Checker
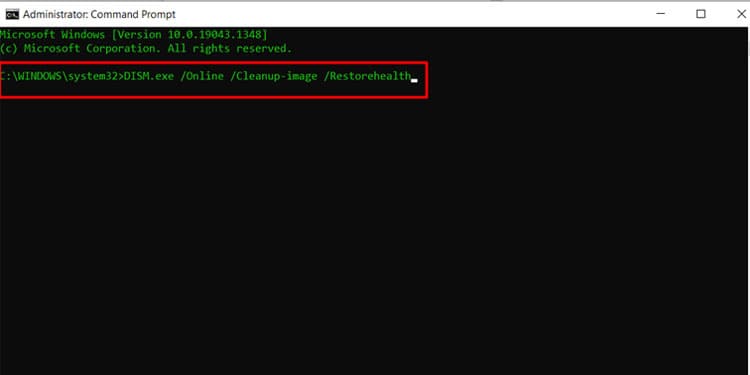
If updating your audio drivers doesn’t repair the files, you can repair them manually. There are technically two ways to run System File Checker in Windows 10. I’m going to describe the easier method here as the other requires that you enter the BIOS settings. This does require typing some commands into the command prompt, but if you follow the instructions carefully it will work. First, open Command Prompt by typing cmd into the search bar on your Windows taskbar. Make sure to right-click on the app and select “Run as administrator” then click on “Yes”. After it opens up, type “DISM.exe /Online /Cleanup-image /Restorehealth” (without quotation marks) then press enter. You need to include the spaces before each / for it to work. That first step may take as long as 30 minutes. After it’s done, you’ll see a notification on Command Prompt that the operation was completed successfully. Now, type “sfc /scannow” (without quotation marks) into the command prompt and press enter again. Note the space before the / here as well.
Scan Your PC for Viruses
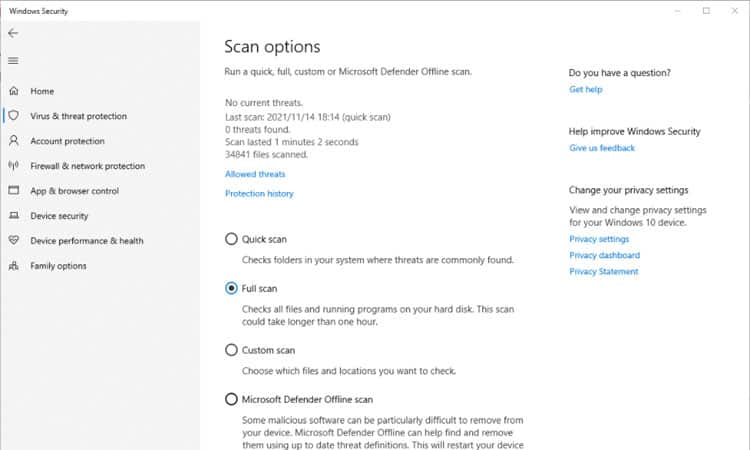
There’s a chance that what you’re seeing isn’t actually happening because something is wrong with your software, but because of a virus masking itself as the app. The next steps will vary depending on what antivirus software you have installed. You want to look for the option to do a full system scan. In Windows Security, you’ll find it under “Virus and threat protection” in the left-hand menu. Click on “Scan options” in the list under the Quick scan button. In the new menu, select “Full scan” and click on “Scan now”.
Uninstall HP Audio Switch
If, after following all these steps, the HP Audio Switch box still pops up on your screen and doesn’t go away, you can just choose to uninstall the app entirely. As I said, it’s bloatware and isn’t necessary for the PC to function so you can just delete it. You can uninstall the app by opening Control Panel from your Windows Start menu. Under Programs, click on “Uninstall a program”. Search for HP Audio Switch in the list then right-click on it and select “Uninstall”. Follow and accept any prompts that pop up. To be on the safe side, you may want to create a system restore point first before uninstalling any HP software. You can find the steps for this in Step 2. You can also download HP Audio Switch from the manufacturer’s website if you ever want to reinstall it again in the future. Select your device to find the latest version of the audio drivers for your PC.
Do You Need HP Audio Switch?
HP Audio Switch is a small app that comes pre-installed on HP devices to make switching between different audio devices easier. It’s not necessary, as you can just as easily switch between these devices by clicking on the sound button on the Windows taskbar. You can safely uninstall the app if it’s bothering you.